Tuesday, August 20, 2013

Find Account Number from Cheque

If you want to check/search the account number of particular cheque, use the menu option INQACHQ.

Finacle Steps

01. INACHQ - Enter
02. Enter Cheque Number - Tab - Sol ID - F4
03. Now the account number having the same Cheque number will be displayed.

Note: Sometime it may show multiple account numbers with same cheque number. Remember those accounts have cheque with same umber but  with different alpha series.

Sunday, August 18, 2013

Stop Payment Processing (SPP)

Stop payments can be marked as per customer’s request through the menu option SPP. Stop Payment instructions for a cheque(s) can be entered only if Issue of concerned chequebook has been acknowledged by customer and is duly entered in the system. Therefore, it is necessary that cheque book should be in acknowledged status before any stop payment instructions are entered in the system.  

Stop Payment  Step-By-Step

01. SPP - Enter
02. S - F4 - A/C ID - F4
03. Begin Cheque No - F4 - No of Leaves - F4
04. Enter Party Details Name - Tab -  Date - Tab - Amount
05. Tab - Reason Code (Press F2 and Select from List ex. Option 2) - F4
05. Option - C (Charge Collection) - F4 - F4
06. Press F10 and send for Verification


Note: Use the option 'G' for modification of general details

Stop Payment Verification

01. SPPAU - Enter
02. V - F4 - A/c ID - F4
03. Begin Cheque No - F4 - F4
04. Option C - F4 - F4
05. Press F10
06. Print Dialogue Box will appear.
07. F (Foreground) - F4 - Y (Print required) - F4 - mention no copies & Printer
08. Press F10 to generate the STOP payment confirmation letter.

Inquire whether cheque is stopped or not.

01. ACM - Enter
02. I - F4 - A/C ID - F4
03. Option Q - F4
04. Select the Cheque Series - Ctrl+E
05. Find the cheque is marked as "Stopped"

Wednesday, August 14, 2013

Chequebook Maintenance (CHBM)

Various cheque book maintenance related operations can be carried out using CHBM web menu option. In case of verification CHBMAU menu option should be used.

Inquire Cheque Book Status

01. CHBM - Enter
02. I - F4 - A/c Id - F4
03. Select the Series - Press Ctrl + E to check details


Add Acknowledgement (If chequebook earlier issued without Acknowledgement)
01. CHBM - Enter
02. A (Acknowledgement) - F4 - A/c Id - F4
03. Select the Chequebook, Shft + F4
04. Press F10

Verification

01. CHBMAU - Enter
02. V - F4 - A/c No - F4
03. Press F10

Destroy Chequebook (Single / Multiple Instruments)

01. CHBM - Enter
02. A - F4 - A/c Id - F4
03. Begin Cheque No - F4 - No of Leaves - F4 - F10

Verification

01. CHBMAU - Enter
02. V - F4 - A/c No - F4
03. Begin Cheque No - F4 - F10


Caution a Cheque

01. CHBM - Enter
02. C - F4 - A/c Id - F4
03. Begin Cheque No - F4 - No of Leaves - F4 - F10

Verification

01. CHBMAU - Enter
02. V - F4 - A/c No - F4
03. Begin Cheque No - F4 - F10

Cautioned status of a cheque can be removed using " U - Undo Caution" function followed by verification.

Saturday, August 3, 2013

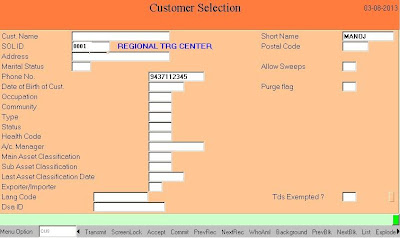
Customer Search (CUS)

In case if you want check a customer is an exciting customer of your bank or not, to find out Customer Id of a person or to know the details, the menu option CUS can be used in Finacle (Web Mode). HCUS is the menu otion for ONS Mode of operation.

Customer ID Search Step-By-Step

01. CUS - Enter
02. Now fill-up any of the relevant fields like Customer Name, Short Name, Address or Phone No
03. To get accurate result Enter more than one field  - Press F4
04. It may show one or more result depending upon the Data entered.
05. Select one record and Press Ctrl+E to check Customer Details
06. If there is no record in the list - Press F3  and Change Data to search again
 

Thursday, August 1, 2013

Account Lien Maintenance (ALM)

One can lien certain amount in an account in Finacle which can not withdrawn unless lien is removed. Lien can be marked in account due to Income Tax Attachment Order, Garnishee Order, Margin Money or Collateral security etc. Even if a customer want load against Fixed Deposit, the FD can be marked lien as guarantor for loan.

Account Lien Maintenance Step-By-Step

01. ALM - Enter
02. A - F4 - AC ID - F4
03. Amount (Mention amount to be Lien) - Tab
04. Expiry Date (the lien will be automatically removed after the date) - Tab
05. Reason (Press F2 and select from list) - Tab
06. Reason (Mention detail lien reason) - F10


Verification 

01. ALM - Enter -
02. V - F4 - AC ID - F4 - Check Lien Details
03. Press F10 to complete the task

Use ACCBAL command to verify the lien amount

Removing Lien (Manually) 

01. ALM - Enter
02. M - F4 - AC ID - f4
03. Change the Lien amount to 0.00
04. Press F10

Verification 

01. ALM - Enter - V - F4
02. AC ID - F4 - Check Modified Lien Details
03. Press F10 to complete the task

Wednesday, July 31, 2013

Activation of Dormant Account

When there has been no financial activity for a long period of time, other than posting of interest, an account can be classified as dormant. Once the account turns dormant you cannot operate account like money cannot be withdrawn, cheque clearance etc. Statute of limitations usually does not apply to dormant accounts, and funds can be claimed by the owner or beneficiary at any time.

Modification

01. ACM - Enter - M - AC ID - F4
02. Option S - F4 - F6
03. Change Account Status "D" to "A" - F4 - F10


Verification

01. ACM - Enter - V - AC ID - F4
02. Option S - F4 - F6 - F4
03. Option 0 (Zero for General Details) - F4
04. F6 - F6 - F4 - Finally Press F10 to Save

Freezing an Account (AFSM)

An account can be frozen in the following cases, viz, Court Order, Garnishee Order, Income Tax/Wealth Tax/Gift Tax attachment, Insolvency, insanity, Dispute between the account holders, death of an account holder, etc.

The freezing can be of three types. Total freeze, Credit Only, Debit Only. Freeze can be done either at the account level, when only the account is frozen or at the Customer Id level, when all the accounts linked to the customer id is frozen.

Menu Option: AFSM - Select ‘F’

Freezing an Account Step-By-Step

01. AFSM - Enter
02. F - F4 - Reason (F2 to select) - F4
03. Freeze Code (T/C/D) - F4
04. Ac ID - Tab - Move to Remark Field and Enter Remark - F4
05. Press F10


Verification

01. AFSM - Enter - V - F4
02. A/c ID - F4
03. Press F10 to complete the task


Unfreeze

When it is found necessary to revoke the restriction placed on the account/customer by freeze, then the same is possible by the Menu Option AFSM and selecting the Option ‘U’ for Unfreeze.

The operations in the account can be resumed only after the above is verified by a different user with the requisite powers.

01. AFSM - Enter
02. U - F4 - Ac ID - F4 - Shft+F4 to Select the Account
03. Press F10 and proceed for verification


Death of a Constituent

When a customer is reported expired after confirming the news the following steps are undertaken.
  1. If the account is with the survivorship basis (E/S, F/S, Any one of the depositor(s)/survivor(s), the balance belongs to the surviving depositor(s).
  2. If the account is in the form of jointly, the balance is paid to the Nominee named or in its absence to the Survivor(s) jointly with the legal heir of the Deceased.
  3. When the account in the name of a single depositor, on the death of the depositor, the amount is paid to the nominee/legal heir of the deceased.

Since the above process may some time, and it is possible that inadvertently certain operations may be put through the account. Keeping this in view the steps followed by the banks is to

First, freeze the account, since after the death of a constituent the amount belongs to the legal heir. The freezing could be restricted to withdrawals (debits), Deposits (Credits) or total (both debits & credits). Subsequently after the formalities are observed the Banks unfreeze the account and the amount is paid to the Legal heir/ nominee and the account is closed.

Tuesday, July 16, 2013

Finacle Commands Quick Reference (pdf)

Download the PDF file containing quick reference of Finacle Commands for both WEB & ONS Mode.

Finacle Commands Guide Download

Monday, June 17, 2013

Cash Payment in Finacle (TM)

Only members of cash department (cashier/Tellers/ Head Cashier) are authorised to pay cash to the customer. Cash can be paid only on the strength of written instruction on the face of a debit instrument, i.e. cheque, Draft, TD Receipt ( less than Rs 20,000/in case of DD/TD ) or any other debit voucher. Cash is also paid against Withdrawal Slip containing thereon written instruction for payment.

When cheque/debit instrument is presented over the counter, the paying cashier/Teller should scrutinise the following to ensure that

a.  the date of the cheque is in order, i.e. it is not stale or post dated.
b.  the cheque is signed by the customer and it bears the signature of customer or its presentor on the reverse.
c. the amount in words  and figure agrees and payee’s name is written on the instrument.
d. the debit voucher is signed by authorised Officer(s).
e. the presentor has been properly identified if it is a Demand Draft or a Pay Order.

On being satisfied with the above check points, the cheque/debit instrument is entered by the CTO/ Teller in the system, and the same is passed on to the verifying officer for Posting/ Verification.

Cash Payment Step-By-Step (assuming the Teller has sufficient power to pass the cheque)

01. TM - Enter
02. A - F4 - Type C - Tab - NP - F4
03. Mention Customer A/c Id - F4
04. Check Mode of operation - Signature by Pressing F9 - Effective Available balance in Customer A/c.
05. Mention withdrawl Amount - Tab - D (Debit) - Tab - Tab (Move to narration field)
06. Type "Cash Payment" - Move to Instrument Type Field - Type CHQ
07.  Tab - Instrument No - Tab - Instrument Date - F4
08. With Option "E", Press Down arrow to create Credit Part Tran
09. Now Move to Debit Part Tran (customer part) using arrow.
10. Remove 'E' and type 'P' in option - Press F4 to Post Part Tran
11. Use arrow to move Credit Part Tran and press F4 to post this part also
12. Press F10 and Note down the Tran ID.
16. Now stamp & sign the Cheque, take acknowledgement on reverse, mention denomination, and hand over Cash to customer
 
Verification (By Supervisor)

01. TM - Enter
02. V - F4 - Tran ID - F4
03. Option "L' (List Part Tran) - F4 - F3
04. Press F10 to complete the task


Cash Payment Step-By-Step (assuming the Teller has no passing power)

01. TM - Enter
02. A - F4 - Type C - Tab - NP - F4
03. Mention Customer A/c Id - F4
04. Check Mode of operation - Signature by Pressing F9 - Effective Available balance in Customer A/c.
05. Mention withdrawl Amount - Tab - D (Debit) - Tab - Tab (Move to narration field)
06. Type "Cash Payment" - Move to Instrument Type Field - Type CHQ
07.  Tab - Instrument No - Tab - Instrument Date - F4
08. With Option "E", Press Down arrow to create Credit Part Tran
09. Press F10 and Note down the Tran ID and send for posting-cum-verification

Posting-cum-Verification (By Supervisor)

01. TM - Enter
02. M (Modify) - F4 - Tran ID - F4 - F9 (Verify Signature) - F4
03. Option "L' (List Part Tran) - F4 - F3
04. Now Move to Debit Part Tran (customer part) using arrow.
05. Remove 'L' and type 'P' in option - Press F4 to Post Part Tran
06. Use arrow key again to move Credit Part Tran and press F4 to post this part also
07. Press F10 to complete the task
08. Send the Cheque to Teller for cash  payment to customer

Issue of Cheque Book (ICHB)

An user can issue a cheque book only if he is in possession of the cheque books.. In case the employee is holding say 1000 leaves of a specific inventory, say 100 lots of 10 leaves each, then the user should split his holding to 10 leaves of 100 lots and then can issue the same..

Web Menu Option: ICHB / ICHBAU

Issue of Cheque Book Step-By-Step

01. ICHB - Enter
02. I - F4 - A/c No - F4
03. Chequebook Acknowledgement Obtained - Y (Yes) - F4
04. Chq Type - Press F2 and Select from List (Ex. SB10) - F4
05. Use Arrow Key to move and Press Shft + F4 to Select Cheque Series displayed below
06. Press F10 to save & Request for Verification


Verification

01. ICHBAU - Enter
02. V - F4 - A/c No - F4
03. Collect MICR Charge - Mention Y if to collect charge else N - F4
04. Press F10

Note: If a chequebook of an holding user is issued by another user, then the holding user must verify to complete the process. Thus, an inventory holder may involve either issue or verifacation of a chequebook.

Thursday, June 13, 2013

Cash Desposit in Finacle (TM)

Cash transaction is one of the key activities through which a bank carries on its business. Finacle provides the facility for handling of cash.

There are three types of cash transaction, viz. (a) Cash Receipt, (b) Cash Payment, and (c) Cash Remittance. Receipt of cash means depositing/ crediting of cash into Savings, Current, Term Deposit, Cash Credit, Overdraft, Loan & Office accounts.

Web Menu Option: TM

Receive the Deposit Slip, Cash and scrutinize slip and count cash. Next enter transaction details in Finacle.

01. TM - Enter
02. A - F4 - Type C (cash) - NR (Normal Receipt) - F4
03. Mention Customer A/c Id - F4
04. Mention Amount - Tab - C (Credit) - Tab - Tab (Move to narration field)
05. Type "Deposit By Cash" - F4 to create the Credit Part Tran (Customer Part)
06. Being present at Specify Option Field with option "E", Press Down arrow to create Debit Part Tran,
07. Now Post all the Part Trans, Change the option 'E' to 'P'
08. Move to Credit Part Tran using arrow - Press F4 - Move to Debit Part Tran - Press F4
09. Once all the Part Trans are posted (mark for Posting Requested message) Press F10
10. Note down the TRAN ID on the Pay-in Slip.
.
Now stamp, sign the deposit slip and give the counter foil to customer and the hook the pay-in slip.


Opening of Savings Account

In Finacle, Savings account scheme has been defined under the scheme type SBA. Scheme type is a broader classification that enlists the various features governing the pattern of the scheme.


Web Menu : OAAC  ONS Menu : HOAACSB

Opening a SB Account Step-By-Step

01. OAAC -  Enter
02. Function O - F4 - Cust Id - F4
03. Scheme Code - F2 - Scheme Type - SBA  - F4 - Select Account Type ex: SB101 - Shift+F4 - F4
04. Select Mode of Operation - F2 - Choose 'Self' - Tab - Location - F2 Select Urban - F4
05. Passbook/Statement - S - F4 - Interest Cr Account Flag - S (Original Account) - F4
06. Interest Dr Account Flag-  S - F4 -  Local Calender - N - F4
07. Frequency - M (Monthly) - Tab - Tab - 31 (date) - N (in case of holiday) - F4
08. Dispatch Mode 'A' - F4 -
09. Next Inst Calc Date Dr - (Last Day of the Current Month) - F4
10. Next Inst Calc Date Cr - (Mention Current Half Yearly End Date) - F4
11. Enter Option - 'S' (Scheme Details) - F4
12. Select Nomination - Y - F4
13. Enter Option 'N' (Nomination Details) - F4 - Name - F4 - Relationship - F4
14. Reg No (maintained manually at branch) - F4 -
15. Mention Address - City - PIN - Country - Post Code - Tab 
16. If Minor - N (if Yes then Enter DOB and Guardian details) - F4
17. Now back on Main Screen, Press F10
18. System will create a Temp A/C ID (Ex: zz230337) Note down the ID and send for verification.

Verification of SB Account

01. OAACAU - Enter
02. V - F4 - Temp A/c ID - F4
03. Now on General Details Option (G), Press F6 - F6 - F4
04. Enter Option 'S' - F4 - F4
05. Enter Option 'N' - F4 - F4
06. Finally Press F10

System may show some warning/exception like:

A/c Balance below the required minimum
Introducer not Customer / New Customer

Now Press F4 Authorise and it will generate 14 Digit Permanent A/C No


(Note: Modification before Verification must be done by the user who created the TEMP ID. Once account verified then Modification can be done through ACM Only)

Tuesday, June 11, 2013

Creating a Customer ID in Finacle

This is the first and foremost step for opening of an account. Whether it is a Savings Account or an Deposit / Advance Account, for any customer a ‘Customer id’ is to be created. The data required for creating the id are the customer details like name, address, age, introducer details, etc. Thus ‘Know Your Customer’ (KYC) will have to be captured while creating the ‘Customer id’. Once this is created any account opened by that customer will be linked to the particular id. Hence due care is to be taken to see that all the relevant fields are filled in correctly. The process is known as Customer Master Maintenance in Finacle which also referred as Customer Identification File (CIF). 

Web Menu : CUMM  ONS Menu : HCUMM

Creating a Customer ID for an Individual Customer Step By Step (using CUMM)

01. Type "CUMM" in menu option - Enter
02. Function A (Add) - F4
03. Enter Customer  Title -  Tab - Name - F4
04. Type Short Name (initial 4/5 letters from main name) - TAB
05. Now enter non-mandatory fields i.e type, status, group, occupation & Gender & Press F4
06. Staff - N - F4 (If "Y" then mention staff details)
07. Minor - N - F4 (If "Y" then mention Guardian details)
08. Non Resident - N - F4 (If "Y" then provide Passport and other details)
09. Trade Finance - Y - F4 (if you choose "N", the customer can not carry out Bill Transactions)
10. Address Type - C - F4 (C- Communication Address, P - Permanent Address)
      The address you will put here first will be printed on Account Statement and dispatching documents.
11. Fill up the Permanent Address (if different from communication address) or Employer Address (F6)
12. Once Address Entry is over Press F4.
13. Purge Allowed. "N" - F4
14. Introducer Details - Mention CUST ID of introducer (Press F11) or Full Name - F4
15. TAX Slab - TDS02 (for individual) - TAB - PAN No (Enter PAN NO if produced) - F4
16. As the General Details (G) is completed - Enter "E" (Currency Details) in Enter Option box - F4
17. In Currency Details, Type INR & press down arrow to add and Press F4
18. To visit Trade Finance Details -Enter "T" in option - Press F4 - Again Press F4
19. Inland Trade Allowed Field - Y - F4
20. Now Press F10 to save the details
21. Note down the Customer ID on the AOF and send it to Supervisor Authority for verification

Verification of Customer ID by Supervisor or Higher Authority

01. CUMM - Enter
02. V - F4 - Customer ID - F4  (It shows general details)
03. Now Press F6 Seven times (7) to visit seven general detail pages - Press F4
04. Now Verify the Currency Details  E - F4 - Press CTRL+E to view details - F4 - F4
05. Verify Trade Finance Details  T - F4 - F6 (Check Inland trade allowed) - F4
06. Press F10, the system will complete the task and will show Record Verified.

Note : If it displays any error then try to verify the section you have not visited.

Sunday, June 9, 2013

Unlock a User

In case the menu is locked and the user is not allowed to log into the system again, then by going through the menu option SAC we have to delete (unlock) the user. This activity can be performed by any Supervisory Staff of the branch.
 
Step-By-Step

01. Type "SAC" in menu option and Press Enter
02. Type "D" in funtion field - Press F4
03. Type "U" in the User field - Press TAB - Enter User ID in the field  ex" ARUN01"  - Press F4
04. Now it will display the Locked User details.
05. Press SHFT+F4 to Select the User ID (* mark will appear)
06. Press F10 to complete the operation.


User Types in Finacle

Captive User:

A "Captive" user is one who can put through transactions affecting the data of his SOL (Service Outlet/Branch) only.  He can also inquire into the database pertaining to other SOL provided the menu he is invoking is "free".

Free User:

A "Free" user is one who can put through transactions affecting the data of his SOL as well as other SOL (InterSOL), provided the menu he is invoking is also "free".  It should be noted that the "free" user could put through transactions affecting on only  the customer accounts of other SOL and no t office accounts.  It should be remembered that even though the user is "free", he couldn't access the database of other SOL if the menu is "captive".

Changing Password in Finacle

User Password expires in 30 days. But, in case a user wants to change his password within this period, use menu option PWMNT.


Note: Take caution while mentioning New Password which should not guessed by others.

Interface in Finacle

Finacle provides three types of user interface

01. Character Mode – No graphics
02. Web Mode – HTML Based, Graphical, Java Applets, Extensive use of Menu Options and Function keys
03. ONS – (Online Services) – Graphical Interface, Use of Mouse extensively and less of usage of Function keys. Latest version of Finacle (Version 10) is in complete ONS mode.

Logging out from Finacle Session

To logout, the user either types EXIT / LOGOUT in the menu option field or clicks on logout in the action field, the screen will appear like this. By Clicking on ‘YES’, the user can exit from the finacle in the systematic method.


Logging into Finacle


When the user invokes a browser application like Internet Explorer  wherein the specific URL ( Uniform Resource Locator) address has been setup, the following login screen will be displayed.


Logging into  Finacle Core Server requires a valid Password of the User ID. If the user is logging in for the first time in Finacle, it will prompt to change the password.


Thereafter one can login with the User Id and the password created by him /her. A dialogue box would popup with licensing details.


Click "OK" to proceed to Main Screen ( in case of Java Error, click "OK" and type "LOGIN" in the menu option box).


Note: Don't share your User ID & Password to any other person. Change your password in regular intervals. Never use any password which can be guessed by other users. System will automatically ask you to change the password after 30 days. Entering wrong password thrice will lock the User ID for further login.

Use of Function Key combinations

Here are the role of function key combinations in Finacle.

 
Note: CTRL+T (WHOAMI) key combination  shows information about the Currently Logged in User

Use of Function keys in Finacle

Check the table for the detail use of Function keys in Finacle.


Note: The function keys can be re-configured as per organisations requirements.

Features of Finacle

Finacle is a robust CBS which run on UNIX environment and use ORACLE as main Database Backbone providing greater stability.

Some Common Features:

01. Offers greater flexibility, so different customization can be performed as per various banks requirement.
02. It is a customer centric software means each and every customer must have a Customer ID to open an account and carry out any transaction.
03. Supports Multiple Language
04. Provides Multiple Level Security (i.e in Operating system Level, Database Level and Application level) to safeguard customer money and information.
05. Embedded with tools and utilities to make smoother day-to-day transactions.


Saturday, June 8, 2013

List of Indian Banks using Finacle for CBS

Here is the list of some prominent Indian Banks use Finacle to provide retail banking solution to their customers.

01. ICICI Bank
02. Axis Bank
03. IDBI Bank
04. Kotak Mahindra Bank
05. Federal Bank
06. ING Vysya Bank
07. Andhra Bank
08. UCO Bank
09. Bank of Baroda
10. Union Bank of India
11. Dena Bank
12. Oriental Bank of Commerce
13. Punjab National Bank
14. United Bank of India
15. Bank of India
&   more ...

Finacle Customers

The use of Finacle is spread across 81 countries globally, including ALEXBANK, ANZ Bank, Arab National Bank, Bank Dhofar, Co-operative Financial Services, Credit Suisse, DBS Bank, Emirates Bank, First Bank of Nigeria, Hatton National Bank, ICICI Bank, National Australia Group Europe, Nykredit, PostBank Uganda Ltd, Raiffeissenbank, Société Générale and Zurich Financial Services.

What is Finacle?

Finacle is a core banking software package developed by Infosys, designed to address various retail banking requirements. The Finacle system is one of the major packages in the arena of core banking in Indian and Asian banking domains.

Introduction

Friends, here is my small effort to provide you some Basics of Finacle which anyone can use/implement in their day-to-day life work areas.It is one of the Popular CBS software adopted various organisations. So, I hope my effort may help some of you.

So, Bookmark the site and Keep visiting regularly for updates.